


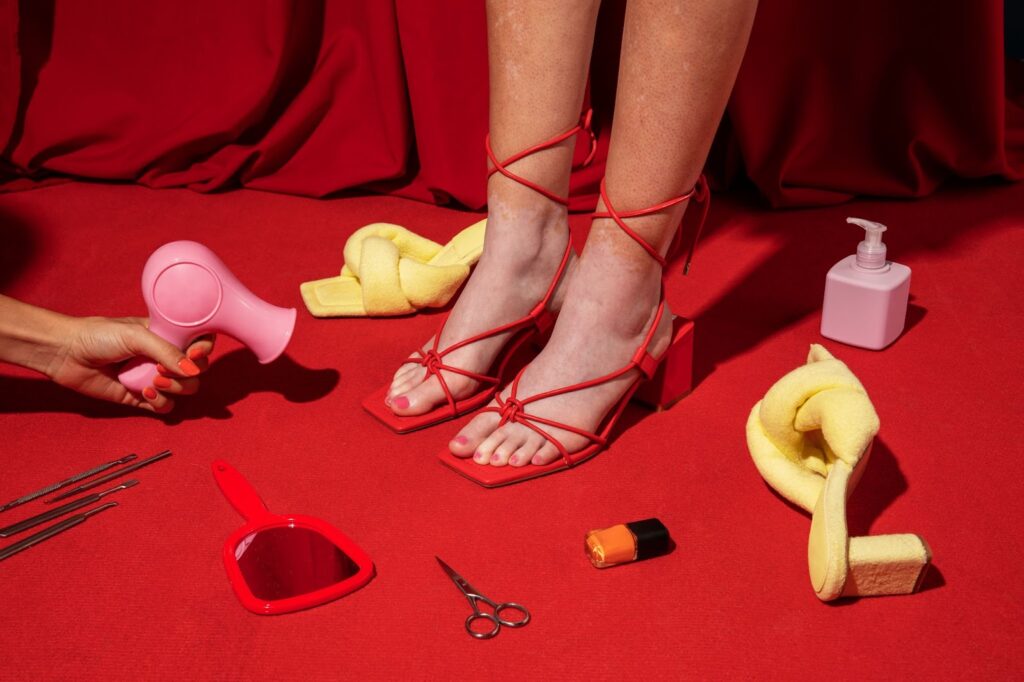


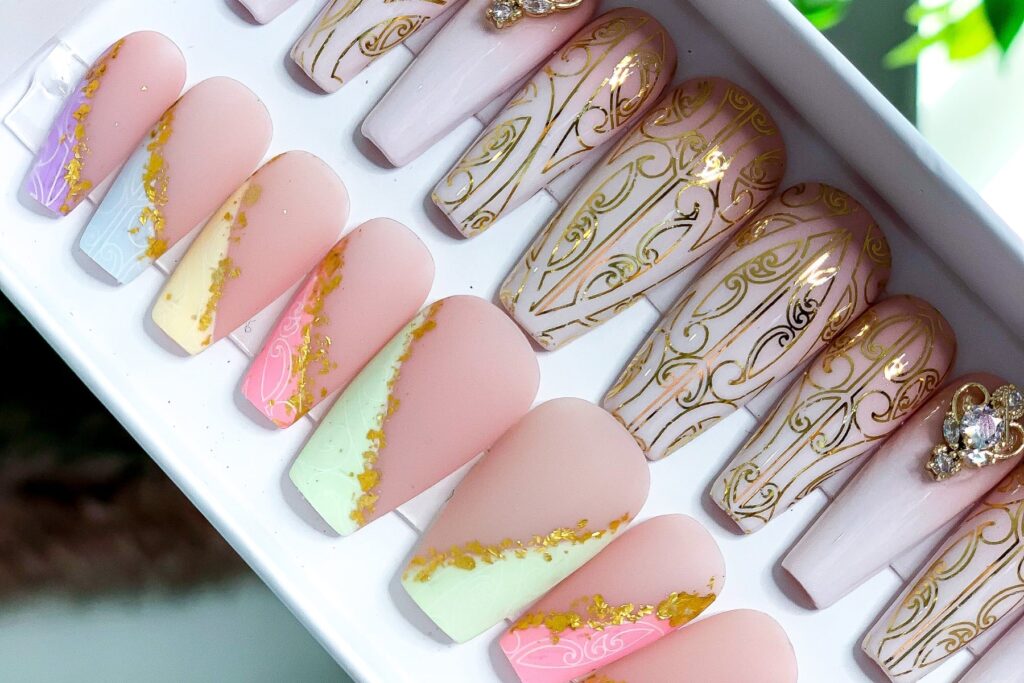


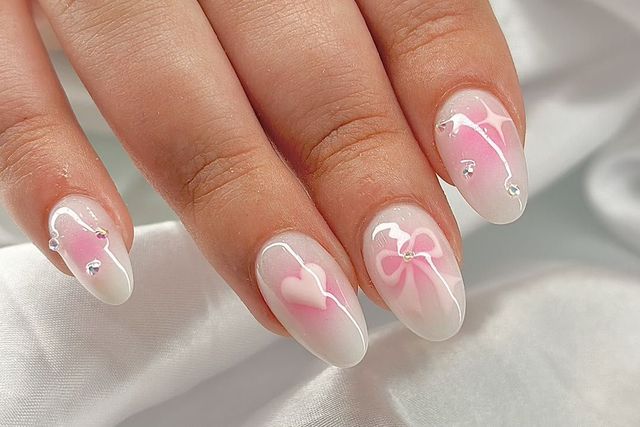


Must-Try Christmas Nail Art Designs To Dazzle This December
Christmas is the perfect time to get creative with your nails, and Christmas nail art is a festive way to add some holiday spirit to your look. As a nail artist, I’ve seen how a little bit of sparkle or a playful design can really make your holiday outfits pop. From the classic reds and greens to more sophisticated metallics and glitter, there’s a nail art style for every preference and skill level.
If you’re new to nail art, don’t worry. Many Christmas designs are simple and easy to recreate at home. Think about classic symbols of the season, like snowflakes, reindeer, Santa hats, or even just a mix of traditional Christmas colors. For those who love a challenge, there are more intricate options like detailed Christmas scenes or layered glitter techniques that can turn your nails into a real conversation starter at holiday parties.
This season is also a great time to experiment with different textures and finishes. Matte nail polishes can offer a modern twist, while glossy top coats bring a traditional, festive shine. And let’s not forget about the joy of adding tiny embellishments like rhinestones or stickers to your designs for that extra touch of holiday magic.
In this blog, I’ll be sharing a variety of Christmas nail art ideas, from the simple and understated to the bold and elaborate. Whether you’re spending the holidays at cozy family gatherings or glamorous festive parties, these nail art designs will surely add an extra layer of cheer to your celebrations. So, grab your favorite polishes and let’s dive into the world of nail art!
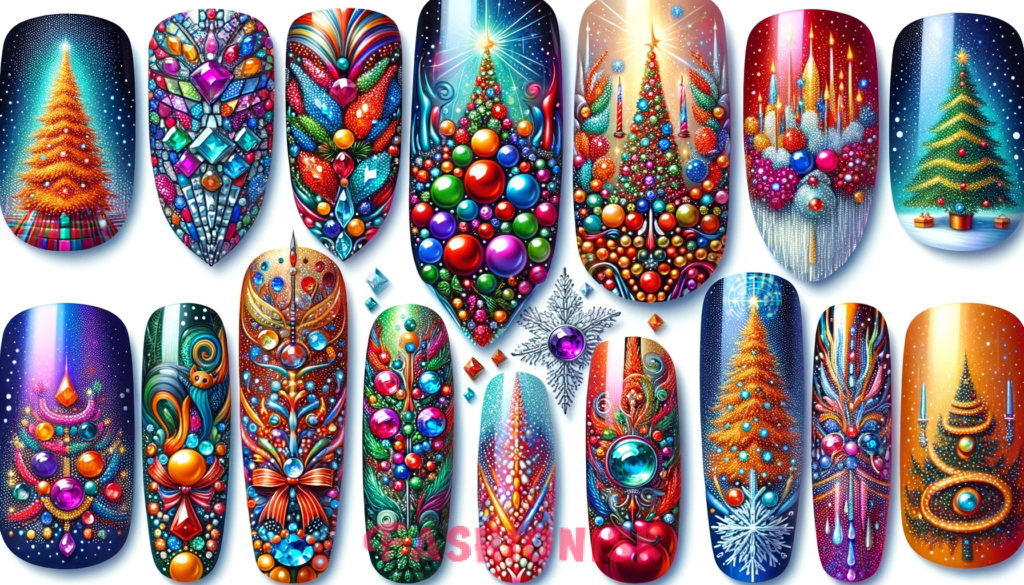
Sparkle and Shine: Types of Christmas Nail Art
Each style offers its own unique charm, allowing you to express your holiday spirit in a creative and personal way.
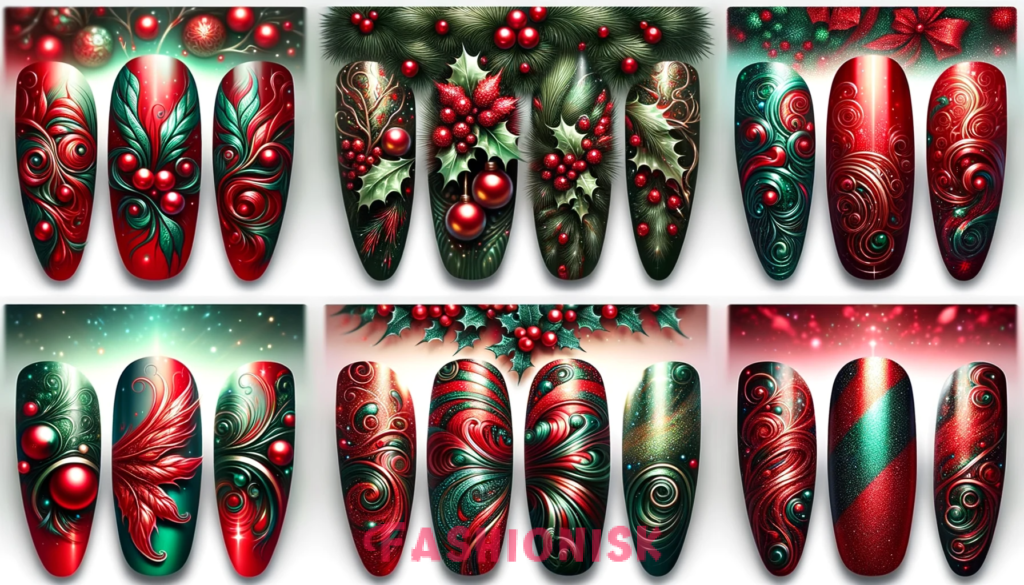
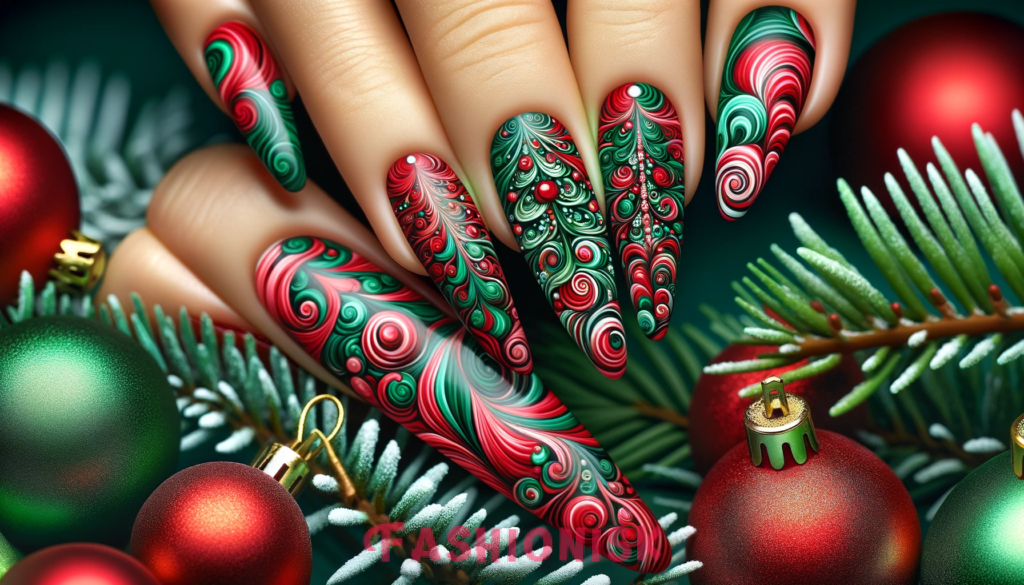
Classic Red and Green
Red and green are the iconic colors of the holiday season, and incorporating them into your nail art instantly adds Christmas cheer. For a classic look, alternate red and green on each nail or create festive patterns like stripes or polka dots. To keep this design looking fresh, apply a top coat every few days. Also, be gentle when opening presents to avoid chips!
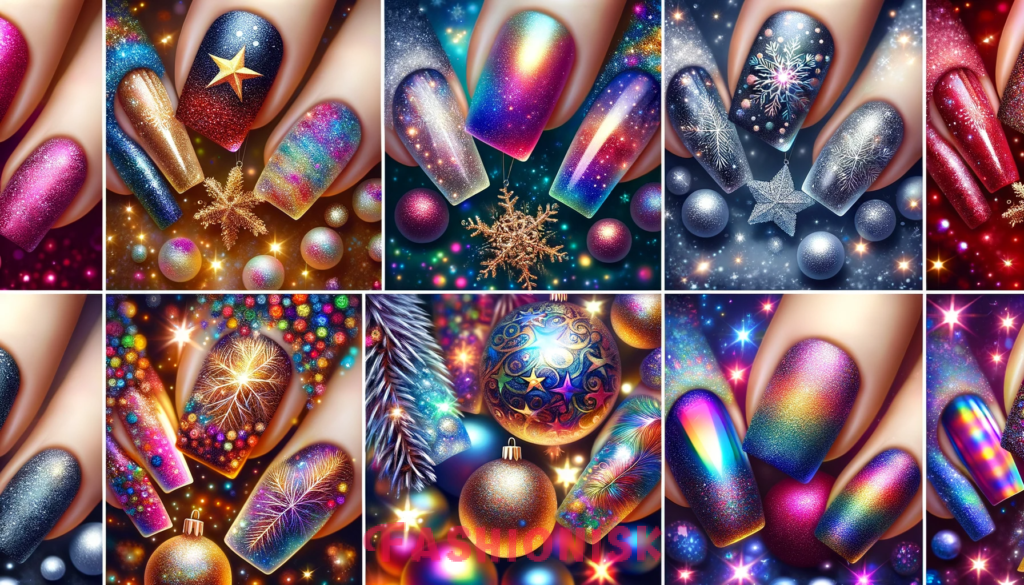
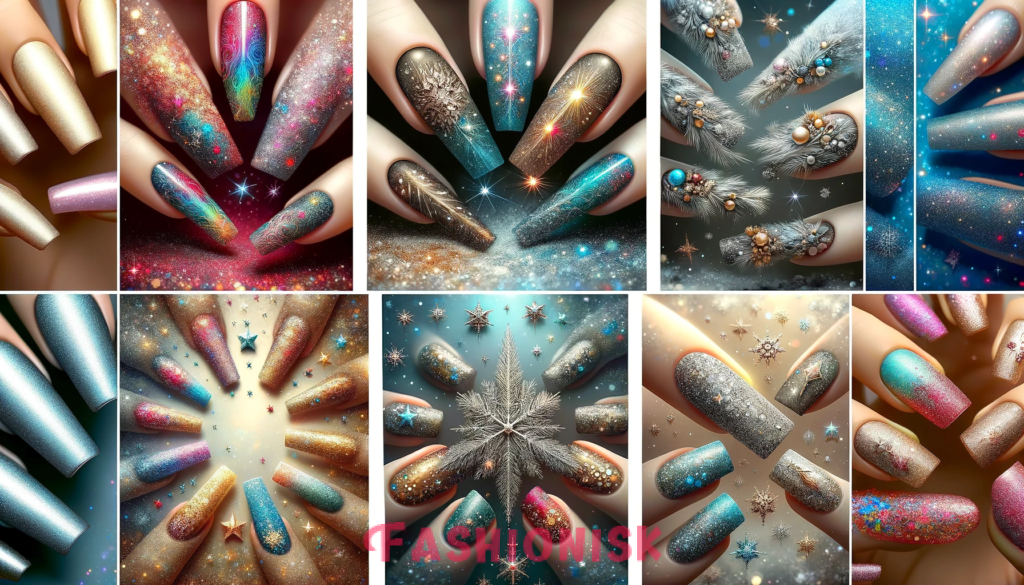
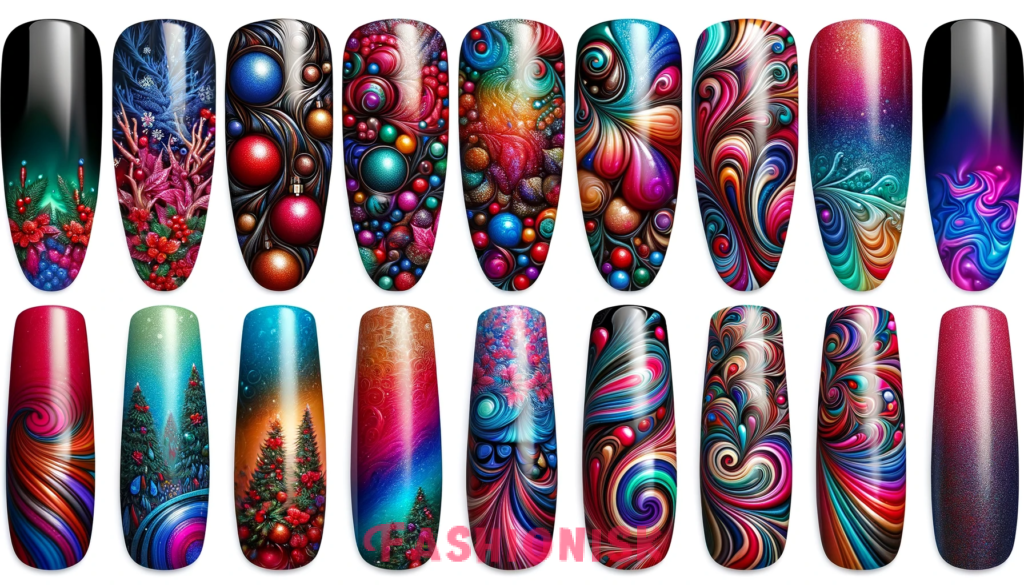
Glitter and Metallic
Glitter and metallic polishes bring sparkle and shine to your holiday look. Go bold with full glitter nails or use metallic accents for a more subtle effect. These polishes can be prone to chipping, so use a good base coat. To remove, soak cotton pads in nail polish remover and gently press onto the nails before wiping away.
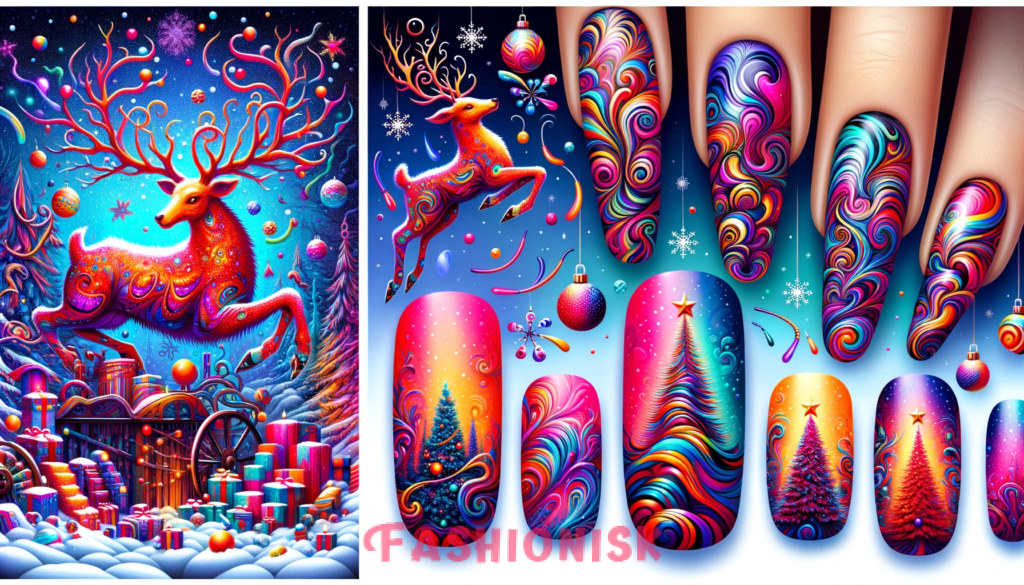
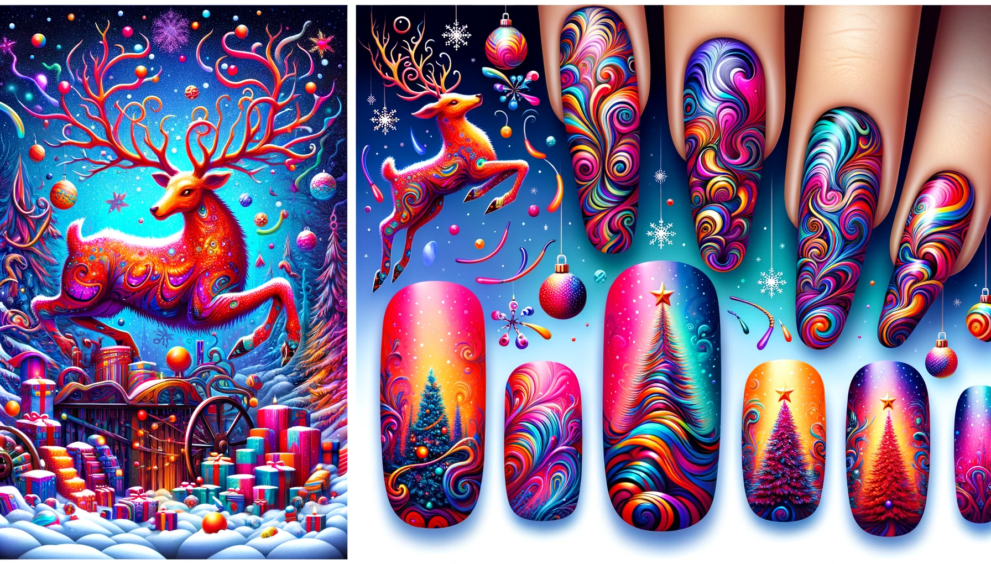
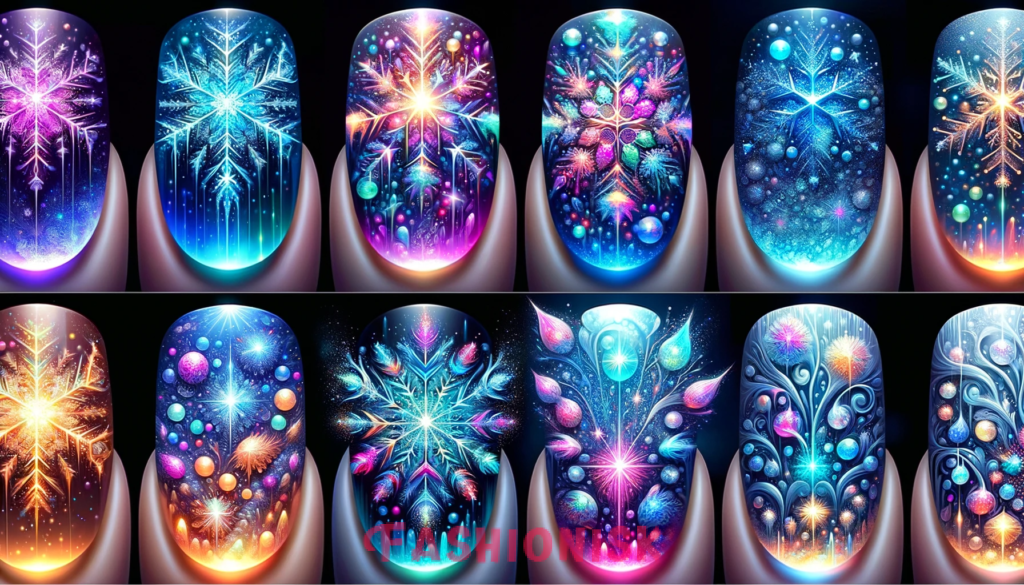
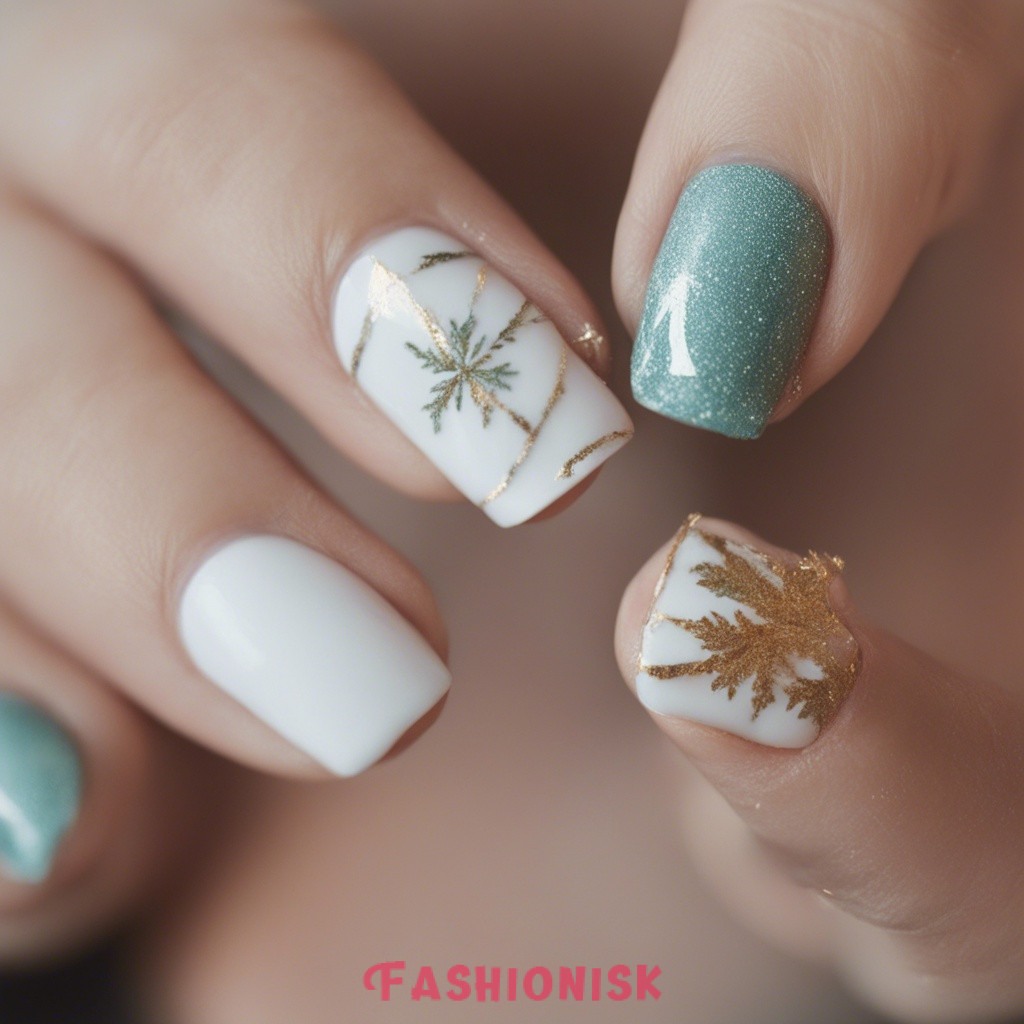
Snowflake Designs Christmas Nail Art
They are a beautiful and elegant way to celebrate the winter season. You can create snowflakes with a thin brush or use stickers for an easier option. Since these designs often involve detailed work, try to avoid using your nails as tools to maintain the art. Use a high-quality top coat to protect your snowflakes from wear and tear.

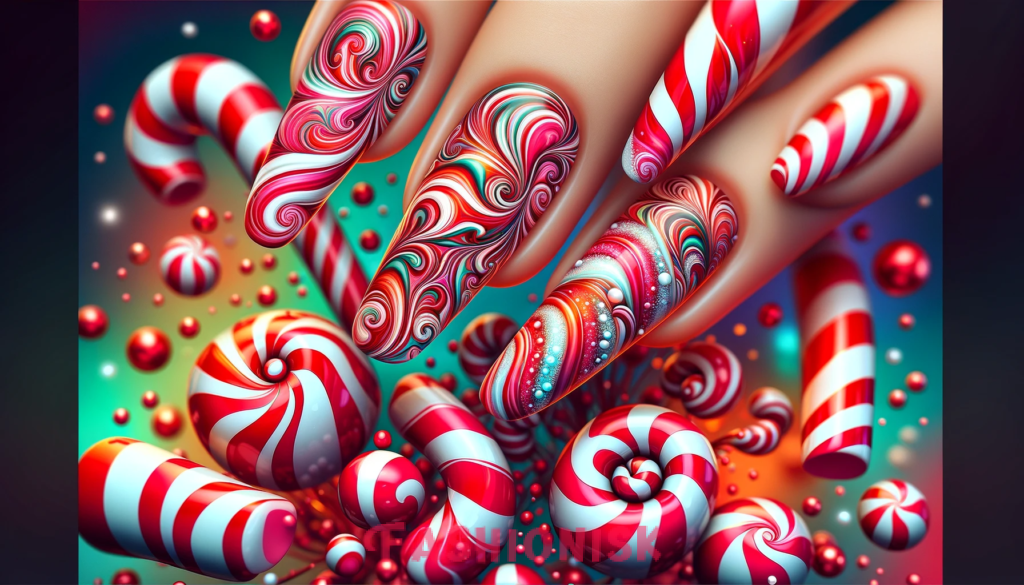
Candy Cane Stripes
They are fun and playful for the holiday season. Use tape to get clean, straight lines. Alternate between red and white for the classic candy cane look, or get creative with different colors. Remember, patience is key when letting each stripe dry to avoid smudging. A long-lasting top coat will help keep your stripes crisp and clear.
Christmas Characters
Characters like Santa, reindeer, or elves add a whimsical touch to your nails. These designs can be detailed, so a steady hand or a visit to a professional might be needed. To maintain these intricate designs, avoid using your nails as tools and apply a top coat every few days. When the holidays are over, use a gentle nail polish remover to avoid harsh scrubbing, which can damage your nails.

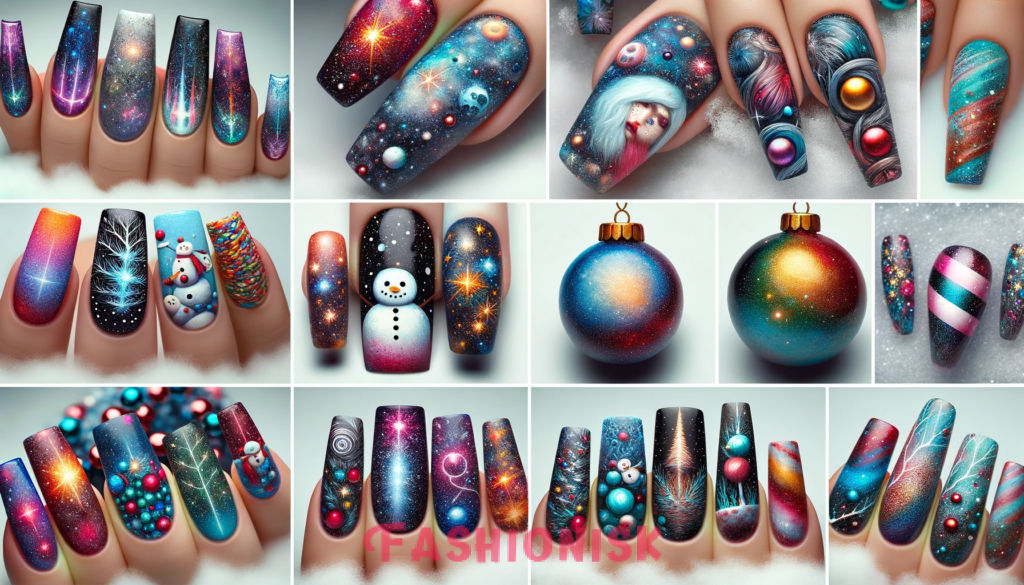
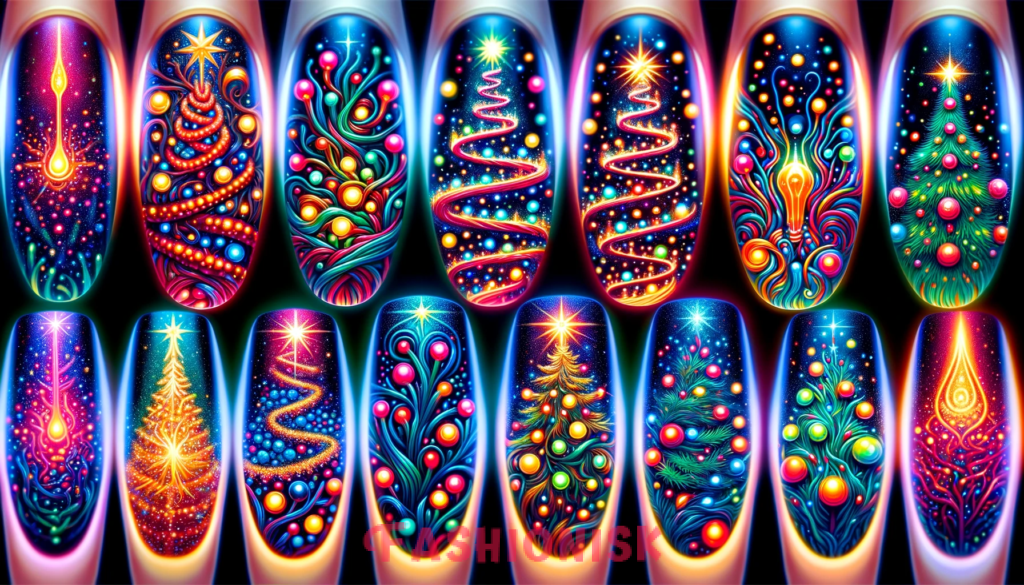
Holiday Lights Christmas Nail Art
Holiday lights nail art captures the essence of festive decorations. To create this look, draw small, colorful bulbs against a dark background, resembling a string of lights. For longevity, use a strong top coat to seal in your design. Maintenance is key here; avoid rough activities that could chip your artwork. To keep the colors vibrant, reapply the top coat every few days.
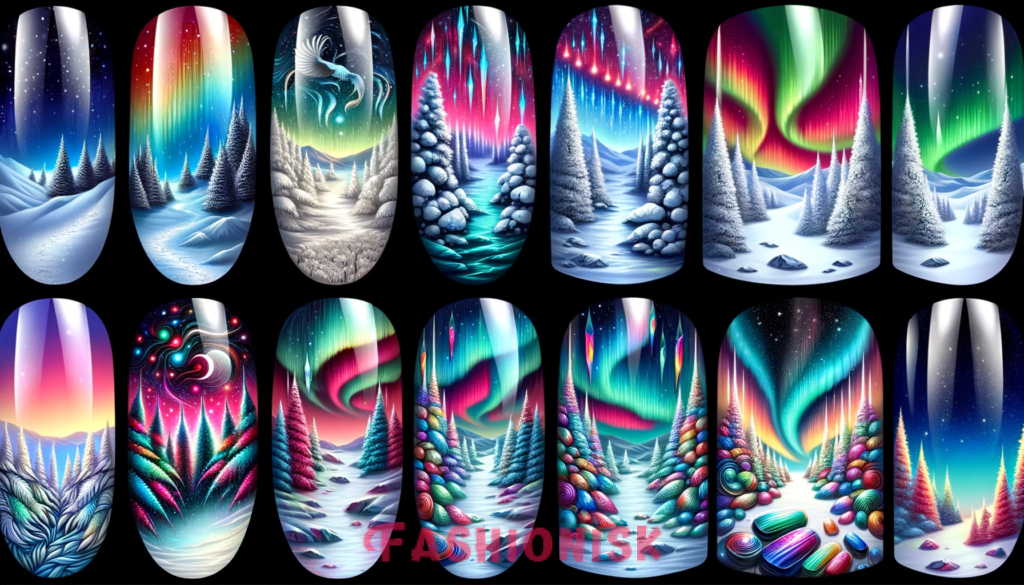
Winter Landscapes
Winter landscapes on your nails can create a serene, snowy scene. Start with a cool blue or white base and add details like snow-covered trees or tiny cabins. These designs require a steady hand, so take your time. To protect your miniature masterpiece, use a top coat and avoid using your nails as tools. Gently retouch any areas that may chip for a fresh look throughout the season.
Festive Plaid
It is a classic holiday pattern that looks chic on nails. Use tape to create clean, straight lines and choose traditional colors like red, green, and gold. Because plaid involves multiple layers, let each coat dry thoroughly to prevent smudging. A durable top coat will help preserve the pattern. Remember to touch up the top coat every few days to maintain the design’s crispness.

Glossy and Matte Combinations Christmas Nail Art
Combining glossy and matte finishes can give a modern twist to your holiday nails. Play with contrasts by having matte base coats with glossy designs or vice versa. This style requires careful application to ensure clear distinctions between the two finishes. A quality top coat over the glossy areas will enhance the effect, and gentle maintenance will keep the matte areas looking smooth.
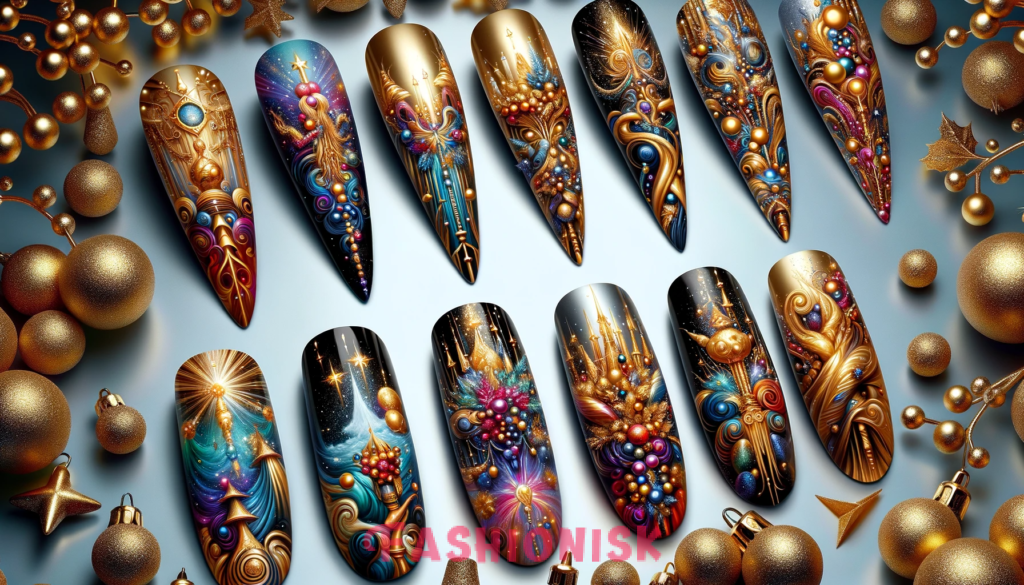
Rhinestone Embellishments
It add a luxurious touch to any Christmas nail art. Apply small stones to accentuate your design, using a tweezer for precision. Secure them with a dot of clear nail glue. Since rhinestones can come off easily, avoid activities that might knock them loose. Reapply a top coat around the stones every few days to keep them firmly in place. When removing, soak your nails in polish remover to gently ease off the stones without damaging your nails.
Negative Space Art
It is a sophisticated approach to Christmas nail designs. It involves leaving parts of the nail unpainted while creating festive patterns around the natural nail color. This style is great for a modern, understated holiday look. Keep your nails well-moisturized to ensure the natural parts look healthy. A top coat will protect your design and maintain the clear lines of the negative space. Touch up the top coat regularly for lasting wear.
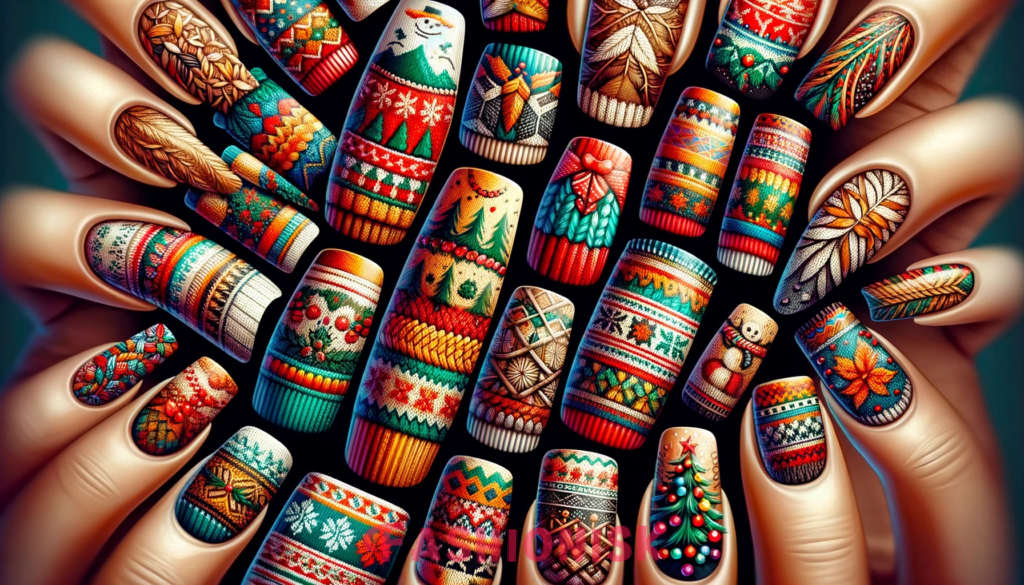
Christmas Sweater Patterns Christmas Nail Art
These patterns on your nails bring cozy holiday vibes. Use a thin brush to paint intricate designs like reindeer, snowflakes, or classic sweater motifs. These detailed patterns require a steady hand and patience. To preserve your design, apply a solid top coat and avoid using your nails as tools. Refresh the top coat every few days to keep your nails looking freshly done.
Gold and Silver Accents
They add elegance to your Christmas nail art. These metallic tones work beautifully as highlights over traditional holiday colors. They can be applied in simple lines, dots, or more elaborate designs. To ensure the metallic polish stays vibrant, use a high-quality top coat. Be gentle with your nails to prevent the metallic accents from fading or chipping.
Minimalist Designs
Minimalist designs are perfect for a subtle yet festive look. Simple geometric shapes, thin lines, or small dots in holiday colors can create a sophisticated design. This style is all about precision, so take your time with the application. A clear top coat will keep your design looking neat. To maintain the minimalist aesthetic, reapply the top coat as needed to protect against chips and wear.
3D Nail Art Christmas Nail Art
They brings an exciting dimension to your Christmas nails. This can include raised designs, textures, or small embellishments like beads or bows. Since 3D elements can be delicate, handle your nails with care. To keep the design intact, avoid tasks that might catch or disturb the 3D aspects. If any elements come loose, you can reattach them with a bit of nail glue. A top coat around the base of 3D elements can also help secure them in place.